Manage Insert Tags
Note
For Cloud environments, your Typefi team configures Insert Tags on your behalf; Customer Administrators with the Manage Configuration privilege can also make changes. For Workgroup and Desktop environments, your Local Administrator performs the steps in this article.
What's included by default
Insert Tags comes with 18 default tags, and is ready to use without additional setup. You can manage the tag list in Typefi Orion Compass v1.1 or later—allowing you to add custom tags, edit existing ones, or change the order they appear in the ribbon. Typefi Orion for Microsoft Word v1.2 or later is also required.
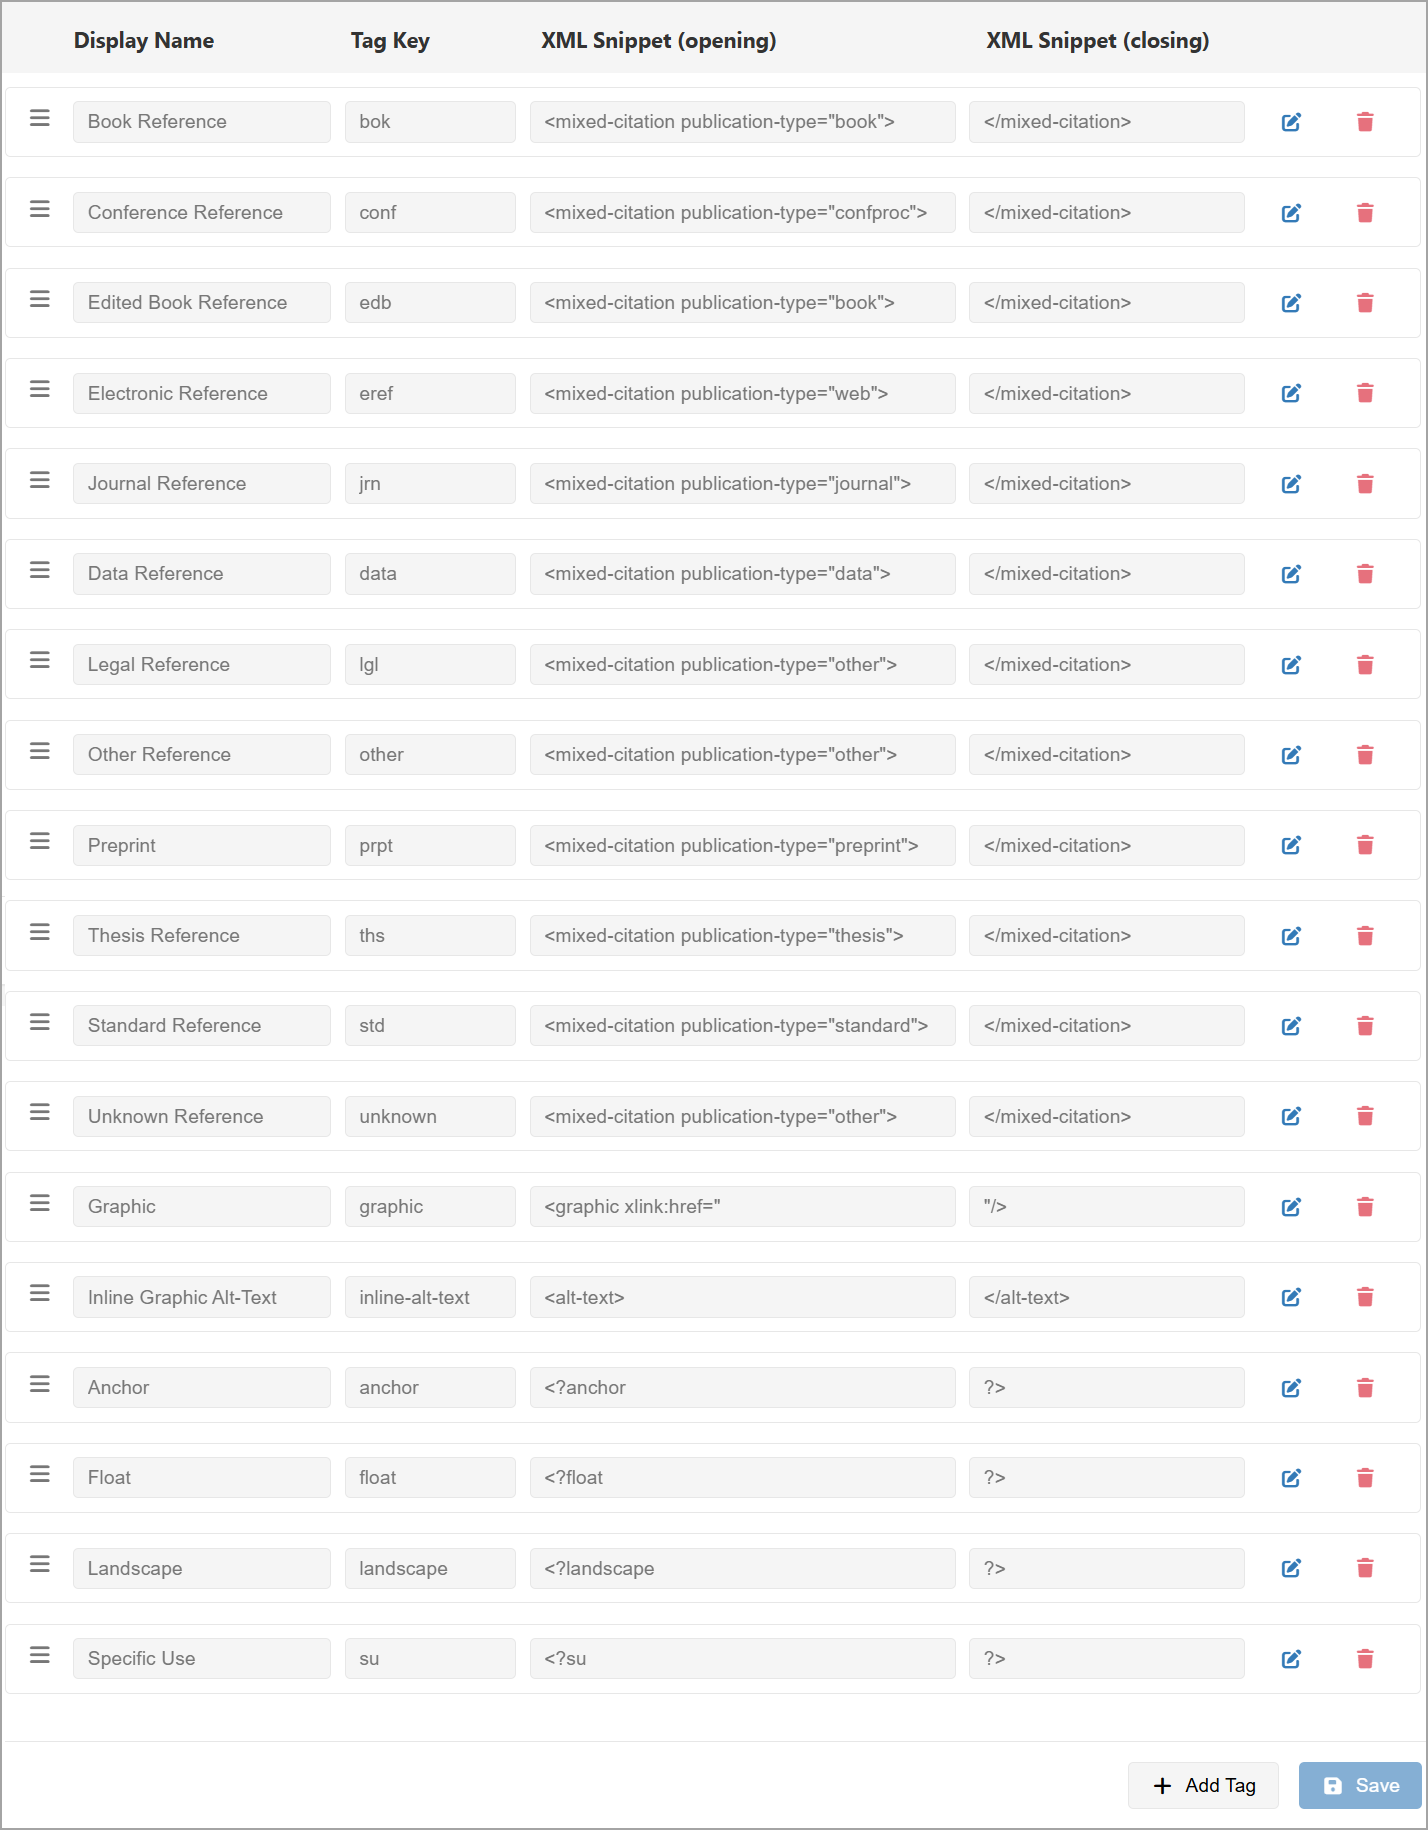
Each tag is defined by four fields:
- Display Name: The label shown in the Insert tag menu
- Tag Key: Unique identifier used to reference the tag
- XML Snippet (opening): The XML inserted before the selected text
- XML Snippet (closing): The XML inserted after the selected text
The following tags are available by default:
Reference tags
| Display Name | Tag Key | XML Snippet (opening) | XML Snippet (closing) |
|---|---|---|---|
| Book Reference | bok | <mixed-citation publication-type="book"> | </mixed-citation> |
| Conference Reference | conf | <mixed-citation publication-type="confproc"> | </mixed-citation> |
| Edited Book Reference | edb | <mixed-citation publication-type="book"> | </mixed-citation> |
| Electronic Reference | eref | <mixed-citation publication-type="web"> | </mixed-citation> |
| Journal Reference | jrn | <mixed-citation publication-type="journal"> | </mixed-citation> |
| Data Reference | data | <mixed-citation publication-type="data"> | </mixed-citation> |
| Legal Reference | lgl | <mixed-citation publication-type="legal"> | </mixed-citation> |
| Other Reference | other | <mixed-citation publication-type="other"> | </mixed-citation> |
| Preprint | prpt | <mixed-citation publication-type="preprint"> | </mixed-citation> |
| Thesis Reference | ths | <mixed-citation publication-type="thesis"> | </mixed-citation> |
| Standard Reference | std | <mixed-citation publication-type="standard"> | </mixed-citation> |
| Unknown Reference | unknown | <mixed-citation publication-type="other"> | </mixed-citation> |
Figure tags
| Display Name | Tag Key | XML Snippet (opening) | XML Snippet (closing) |
|---|---|---|---|
| Graphic | graphic | <graphic xlink:href=" | "/> |
| Inline Graphic Alt-Text | inline-alt-text | <alt-text> | </alt-text> |
Figure placement
| Display Name | Tag Key | XML Snippet (opening) | XML Snippet (closing) |
|---|---|---|---|
| Anchor | anchor | <?anchor | ?> |
| Float | float | <?float | ?> |
| Landscape | landscape | <?landscape | ?> |
Specific Use
| Display Name | Tag Key | XML Snippet (opening) | XML Snippet (closing) |
|---|---|---|---|
| Specific Use | su | <?su | ?> |
Manage tags
To open Insert Tags settings in Orion Compass:
- Sign in to Typefi Server with admin credentials:
- Cloud:
https://orion.typefi.net - Workgroup or Desktop:
http://localhost:8080
- Cloud:
- Select the Switch app (9-dot menu) in the top-right corner, then select Orion Compass.
- Navigate to Configuration Options → Global Settings, then select Insert Tags in the left menu.
From here, you can add, edit, delete, and reorder tags. Click Save after making any changes.
Add a tag
- Click Add Tag.
- In the Add Tag dialog, complete the following fields:
- Display Name: Required; for example Inline Code
- Tag Key: Required; must be unique across all tags, for example
InlineCode - XML Snippet (opening): Required; for example
<code> - XML Snippet (closing): Optional; for example
</code>
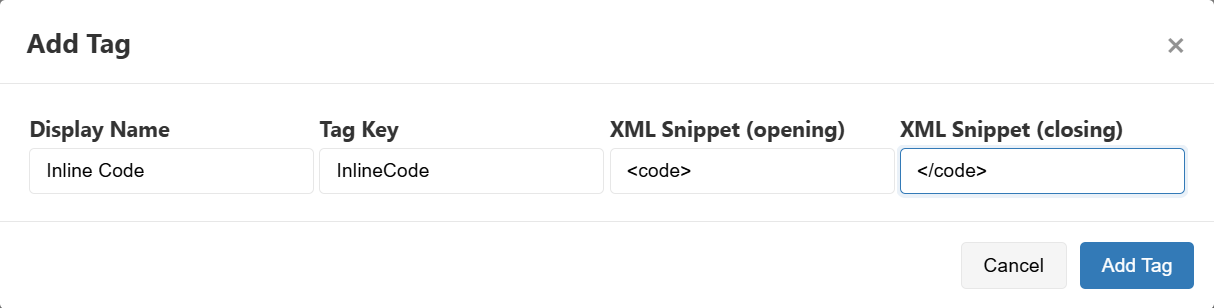
- Click Add Tag. The new tag appears at the bottom of the list.
- Optional: To move the tag to a different position, see Reorder tags.
- Click Save.
NOTE
The Add Tag button in the dialog is disabled until all required fields are valid.
Edit a tag
Editing a tag updates the Insert Tag menu in the Orion ribbon.

- Click the edit button next to the tag you want to update.

- Edit the Display Name, Tag Key, XML Snippet (opening), or XML Snippet (closing) values directly in the row.
- Click the confirm button to apply your changes.

- Click Save.
Delete a tag
Deleting a tag removes it from the Insert Tag menu in the Orion ribbon.

To delete a tag:
- Click the delete button next to the tag you want to remove.

- When prompted, click Delete to confirm.
- Click Save.
Reorder tags
The position of tags controls the order they appear in the Insert Tag menu in the Orion ribbon.
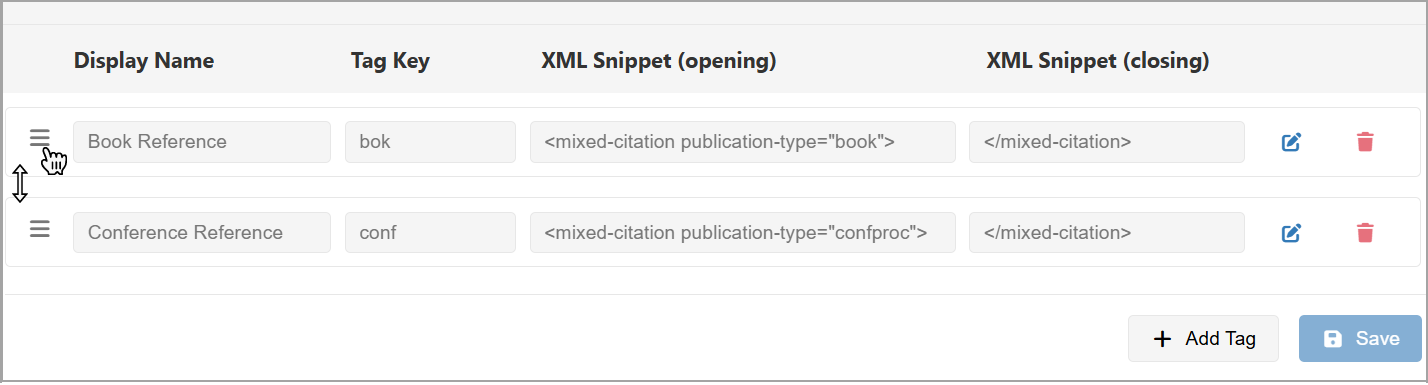
To reorder tags:
- Click and drag the handle icon next to a tag to move it to a new position in the list.
- Click Save.
Next steps
For guidance on using Insert Tags to tag content in Orion for Word, see the Insert Tags reference guide.