Import your configuration in Typefi Orion Compass
Note
This article is for existing eXtyles customers migrating to Typefi Orion. For Cloud environments, your Typefi team completes the import process on your behalf. For Workgroup and Desktop, your Local Administrator performs the steps outlined in this article.
During onboarding, your Typefi team will work with you to migrate your existing eXtyles configuration. This article outlines what happens during that process and what you need to provide.
Gather requirements
Before importing your configuration, your Typefi team will request the following:
eXtyles configuration files: Your existing eXtyles setup exported as a ZIP archive (for example,
ACME.zip).Description Where to find it Configuration file \eXtyles\XXXConfig.ice
For example,C:\Program Files\eXtyles\TypefiConfig.iceCustomer data folder eXtyles\XXX\
For example,C:\Program Files\eXtyles\TypefiNote:
XXXrepresents the name or abbreviation of your organisation.Sample content: A representative selection of content from your existing publications, covering all article structures, document types, paragraph styles, layout variations, reference formats, editorial conventions, and any non-standard content or formatting exceptions in use. Your consultant can advise on what to include.
Content types to include:
- Publication metadata
- Content structure
- Front and end matter
- Body content
- Table of Contents (TOC)
- Hyperlinks
- Tables and figures
- Lists and equations
- Indexes and references
- Notes (footnotes and endnotes)
Editorial requirements:
- Citation styles
- Reference formatting rules
- Cleanup and normalisation rules
- Journal-specific requirements
Publication details CSV (optional): Your Typefi team can supply the required CSV template needed to import your publication details during configuration—contact your Solutions Consultant to request it.
Import your configuration
Create an Orion configuration folder
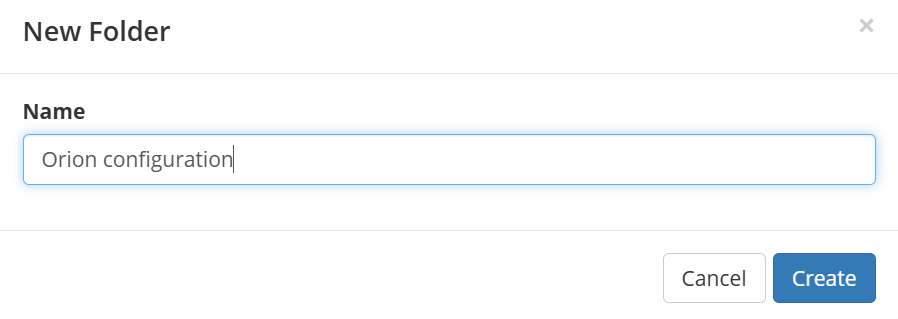
- Sign in to Typefi Server as an administrator.
- In Files, click New Folder.
- In the New Folder dialog, enter Orion configuration as the folder name.
Add configuration files in Typefi Server
- Open the Orion configuration folder.
- Click Add Files. In your file explorer, locate the ZIP archive containing your eXtyles configuration, for example
ACME.zip. - Select the folder and click Open.
- Select Expand in the Upload files dialog.
- Once uploaded, you will see your organisation's configuration folder(s) and a
config.icefolder (for example,ACMEfolder andACMEConfig.ice) at the root of the Orion configuration folder.
Import configuration in Typefi Orion Compass
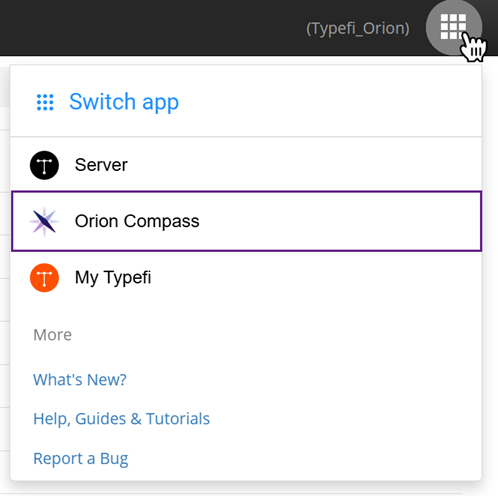
- In Typefi Server, select the Switch app (9-dot grid) in the top-right corner, then select Orion Compass.
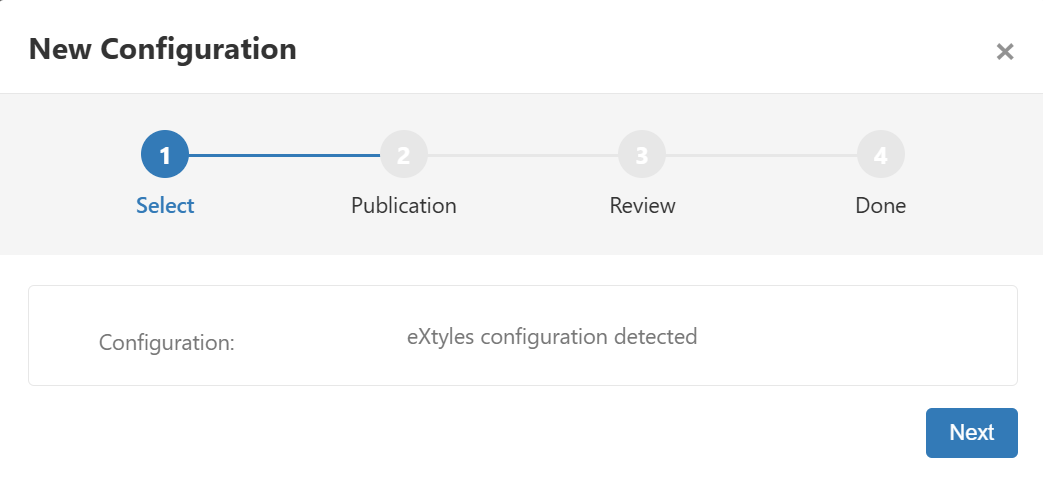
- In the Existing Configuration view, select New Configuration.
- The New Configuration dialog displays 'eXtyles configuration detected'. Select Next.
- In the Publication step, choose how to add your publication details:
- Import Publication – If you have prepared a CSV file containing your publication details (for example, Publisher, Publisher Name, Journal ID, and Abbreviation), select this option to automatically import all publications at once.
- Click Import to open your file explorer and select your publication details CSV file (for example,
ACME publication details.csv).
- Click Import to open your file explorer and select your publication details CSV file (for example,
- Create Publication – If you do not have a CSV, select this option to manually enter each publication's details.
- Import Publication – If you have prepared a CSV file containing your publication details (for example, Publisher, Publisher Name, Journal ID, and Abbreviation), select this option to automatically import all publications at once.
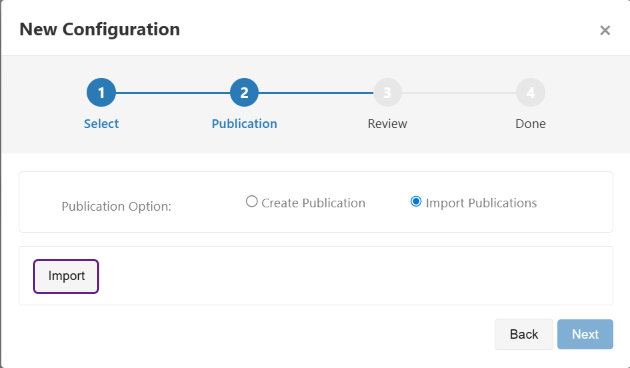
- Click Next.
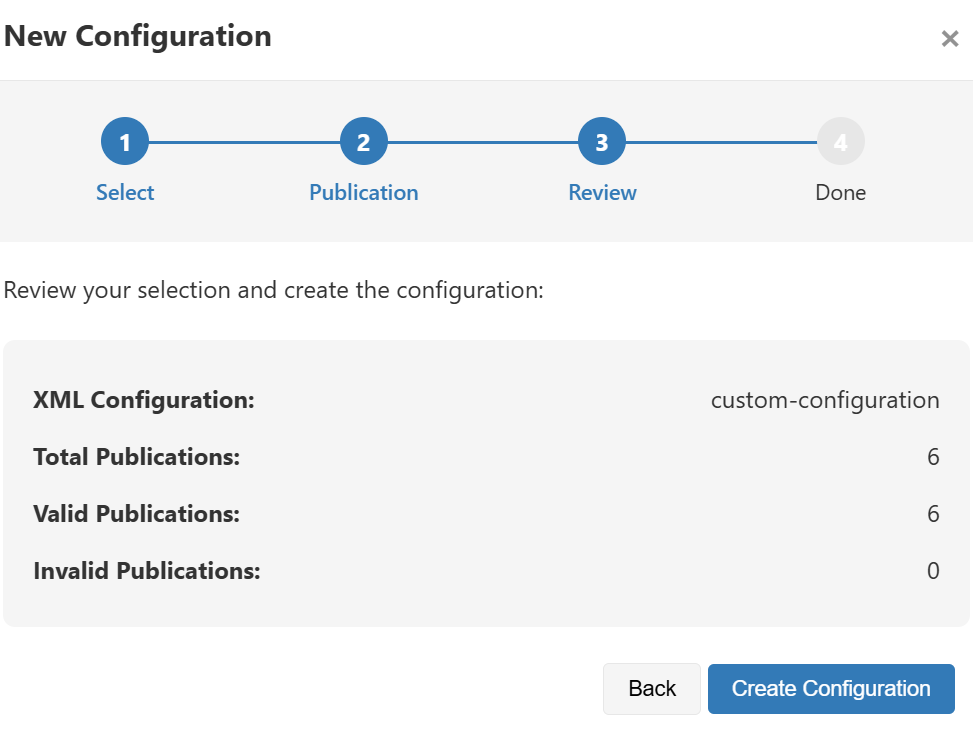
- Review and confirm your configuration details, then select Create Configuration. To make a change, select Back.
Import global settings
Coming soon
Step-by-step guidance for importing and configuring each global setting will be available soon.
After importing the configuration, the following global settings are imported and configured:
- Article Type
- Document Metadata
- Style Configuration
- All Styles
- Style Sets
- Style Groups
- Cleanup
- Citations
- Export to XML
- Object prefixes
Incomplete configurations are indicated by an exclamation mark icon next to each option. Configuration is complete when the icon is no longer visible.
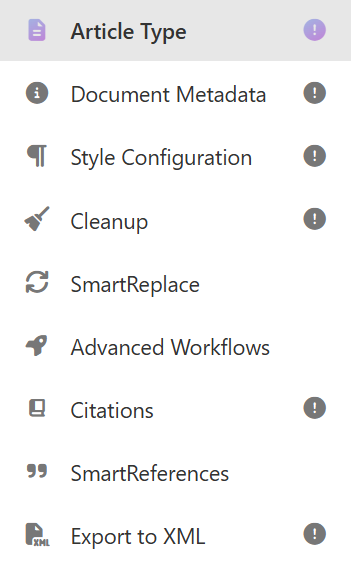
SmartReferences
SmartReferences does not currently display an incomplete configuration icon. Select SmartReferences to manually select your Edifix style before completing the import. This will be addressed in a future release.
Review and validate
Once configuration is complete, your Typefi team walks through the configured settings with you, processes the sample documents to validate the setup, and reviews outputs against your editorial requirements. Then, adjustments are made based on your feedback before your editorial team begins using the system.
Next steps
Once your configuration is imported, you'll set up the following with your Typefi team:
- SmartReplace - Configure text normalisation rules
- Advanced Workflows - Configure editorial and production workflows
- SmartReferences - Configure reference styles and citation handling